Email Setup

For assistance with connecting your GMAIL account, please see: GMAIL SETUP
For assistance with connecting your Office365 account, please see: Office 365 Setup
For assistance with connecting your YAHOO! account, please see: Yahoo! Setup
To add a new email account, go to the “Main Menu” (the 4 small squares at the top right corner) and click on: “Company Settings“
On the Company Setup go to the “Email” tab then expand “Email Accounts“.
Then click on “New Email Account“:
Below is an example of a completed Email Account:
You cannot view sent emails in Teesom, therefore it is recommended in the New Email Account setup that you setup a BCC (blind carbon copy) email (to yourself).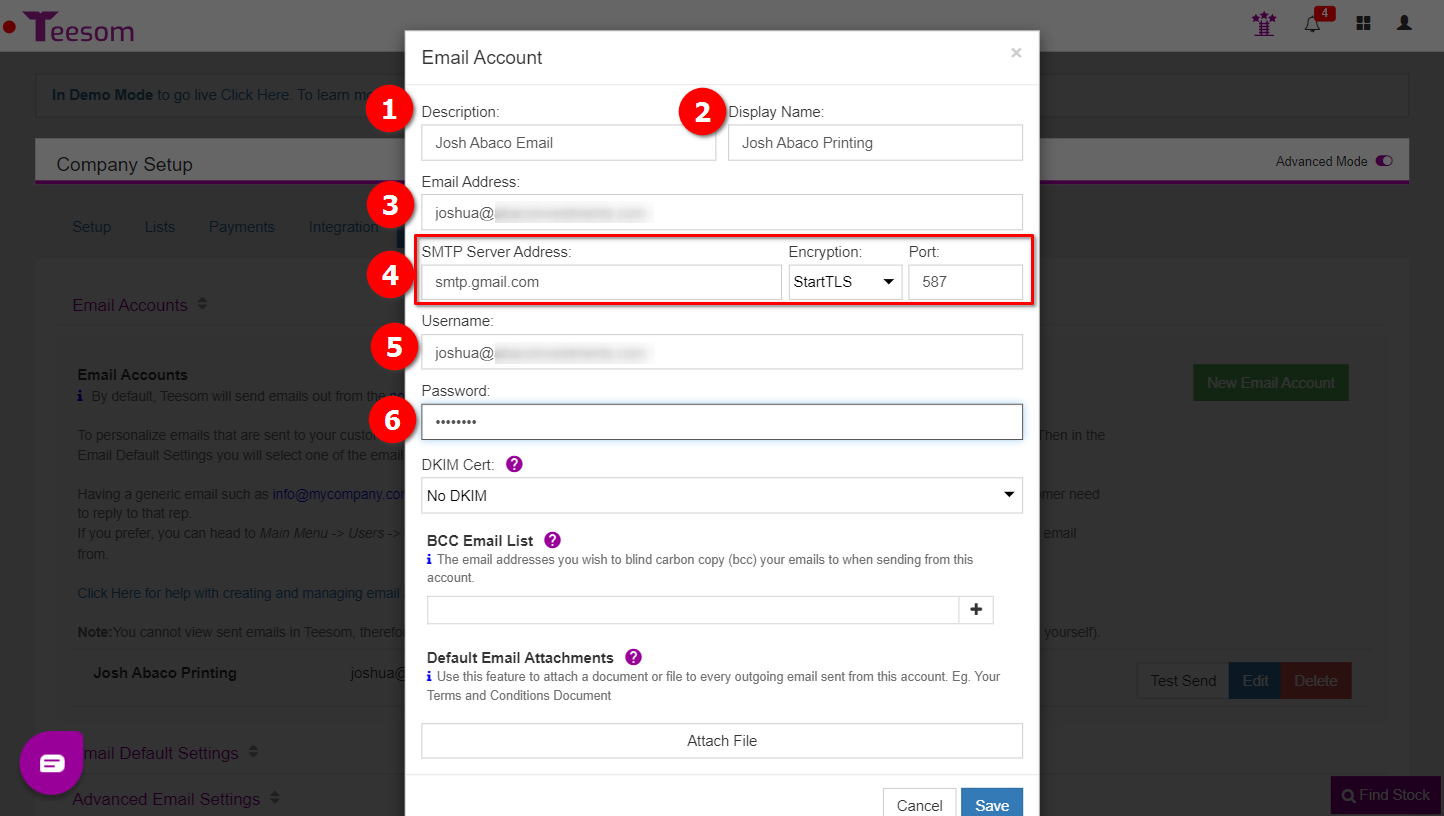
Related Articles
Customize Email Templates
There are a variety of email templates within Teesom that you can easily customize. To get started, go to the Main Menu and click on "Company Settings." On the Company Setup page, under the Setup tab, you can customize your email templates in the ...Set Your Default “From” Email Address
In Teesom, you can set a default sending email for the entire company, as well as individual default emails for each user. Set Your Company Default Email to Send From Open the Main Menu and click “Company Settings.” On the Company Setup page: Click ...Company Setup - Setup Tab
The "Setup" tab is where can setup your company wide settings and defaults. To get to the "Setup" tab, go to the 'Main Menu' and click "Company Settings". Some of the things you can set up include: My Company: Add custom logo and banner images for ...Sales Tax Setup
You can set up your sales taxes from the “Company Setup” screen. To access this, go to the Main Menu and select "Company Settings." On the “Company Setup” screen, click on “Lists” and then expand “Sales Tax.” Here, you can view, edit, and create your ...Company Setup - Lists Tab
To access the "Lists" tab, go to the 'Main Menu' and click "Company Settings." There are a variety of things that can be customized on the "Lists" tab. Some important sections to pay attention to are: Sales Tax: Add, change, and manage your sales tax ...